
|
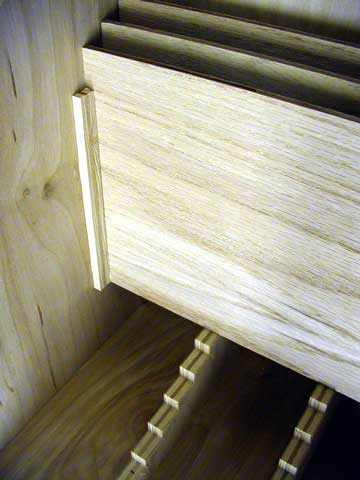
I have some pretty nice saw blades for my table saw but unfortunately I just keep them in a pile in my cupboard. Not only does it make it hard to find the one I'm looking for but I'm sure it's not good for the blades. This box should do the trick to solve both problems.  Here's a list of what you'll need;
11 3/4" wide by 31". This will make the front of the box, the front of the lid and the back of the box. Cut the box front 8" tall. Cut the lid front 7 1/8" tall. Cut the back 15 1/4" tall. 8 1/2" wide by 31" for the two sides. 14 3/4" high in back and 8" high in front. Approximately 38 degrees. Be sure and keep the box and lid pieces matched so they mate up and look good. Cut the long side of the lid 7" high. This should leave a 1/2" step at the top edge. 8 1/2" wide by 22" for the top and bottom. Cut the top and bottom 10 3/4" wide. Cut the steps from 1/2" plywood. Use double sided tape to hold two pieces of wood together and cut them at the same time.  Lay out the cuts as follows: 3/8" up, 3/4" over, 3/8" up and 3/4" over. Continue this for 9 steps. The last flat should be 1/2". As a double check the back of the steps should be 3 3/4" high. Rip 3 pieces 1/4" wide and then cut them into 20 pieces 6" long. From the 1/4" plywood cut 10 pieces 10 3/4" X 7".
All the pieces will be glued and nailed together.  Now add the dividers. This works best with the box laying on its back. Glue spacers along the sides and dividers against the spacers and flush into the notch of the steps. I didn't nail these in but I did place some weight on them until they were dry.  Add the front of the box and you are complete with the bottom. Next make the lid by putting the sides on flush to the front and back of the top. Put the front on flush to the top and sides. Mark the center of the lid and drill a 3/8" hole for the carriage bolt. This will be for holding your dado blades. Mount the top to the box using the piano hinge. Sand everything and add a finish if you like. Mount a handle on the top and the carriage bolt for the dado blades. Put all your blades in and you're good to go. If you plan on using this box on a job site you might want to add handles to the sides and a latch for keeping it closed. When it's full of blades it can be a little heavy. |
|
The AllAmerican RunnerDuck Review Visit our Blog, www.runnerduckreview.wordpress.com, and sign up to receive notifications when it is updated. Our newsletter is a monthly blog with woodworking projects, crafts, recipes, and more. When you get to our blog just enter your email address and click "Sign Me Up". This is what it looks like:

|