

For more great plans click on the banner below.
|
|
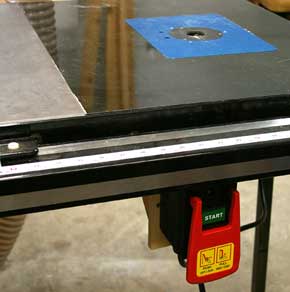
I purchased a paddle On/Off switch, from Rockler, but there was no easy way to mount it securely to my tablesaw. The beauty of a paddle switch is that you can "kick" it off with your knee if you get into trouble. Because of that I wanted it mounted securely. The backing plate is from 1/2" birch plywood and I used 3/4" for the supports. Locate the 1/2" plywood with the switch on the saw and mark the length and the bolt holes for mounting the switch. Cut the backing plate 1 1/2" wider than the switch. Drill the mounting holes for the switch; I drilled 1/4" holes.  Cut two 45 degree braces from 3/4" plywood. Make the top mounting plate from 3/4" plywood, 1 1/2" wider than the backing plate and approximately 10" long. Pre-drill and countersink all the holes. Using a fence square up the support pieces, drill, glue and screw them onto the backing plate.  Align, drill, glue and screw the mounting plate onto the support pieces. 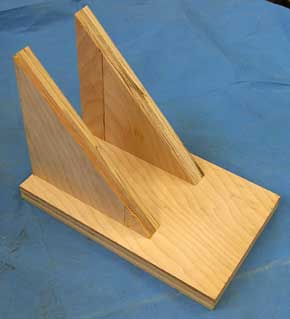 The completed assembly should look something like this.  Screw the mounting plate to the bottom of your table and you now will be running a much safer routing operation.
That's about it. We hope you liked this project. If you build it and your friends ask where you got such a clever idea, please tell them that you got it at RunnerDuck.com.
That's about it. We hope you liked this project. If you build it and your friends ask where you got such a clever idea, please tell them that you got it at RunnerDuck.com.
|
|
The AllAmerican RunnerDuck Review Visit our Blog, www.runnerduckreview.wordpress.com, and sign up to receive notifications when it is updated. Our newsletter is a monthly blog with woodworking projects, crafts, recipes, and more. When you get to our blog just enter your email address and click "Sign Me Up". This is what it looks like:

|