

For more great plans click on the banner below.
|
|
We have a small 5th wheel camper and storage is always a problem. I thought that if I had a small foot stool to prop my feet on when I watch TV it would also make another place to store stuff. It's a pretty simple design and it gave me the opportunity to use the biscuit cutter I got for Christmas.
 Porter-Cable Deluxe Biscuit Joiner, Model No. 557
Here's what you'll need:
Align they biscuit joiner with the marks and make your cuts. Now glue the panels together with biscuits. I used #10 biscuits. Put glue on one half of the biscuit and insert it into the slot. Apply glue all along the edge. Apply glue to the other half of the wood and apply additional glue to the biscuits. Put the pieces together and clamp them. Not only clamp them from the edges but add a couple of pieces of scrap wood across the top and clamp them to help keep the surface flat during the drying. Once all the pieces are dry we'll start cutting them to size.
 Cut the panels to width and then using my tablesaw sled, RunnerDuck Project, www.runnerduck.com/tablesaw_sled.htm, I cut all the pieces to length. Setting up a stop-block on the sled makes the job quicker and more accurate.
 Mark the locations for the biscuits on the front and back and then transfer those lines to the sides.

Cut the biscuit slots into the ends of the front and back.
 Cut a groove 1/4" up from the bottom of the front and back. The groove should be 1/4" deep and wide enough for a 3/16" piece of plywood. I used my router with a 3/16" bit set 1/4" high.
 I put a 1/8" round over bit into my router and radiised the front and back edges of the sides.
 Round Over Router Bits
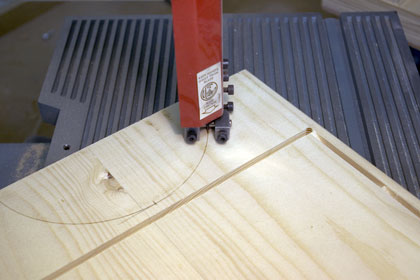
Cut the legs into the ends leaving 1/4" between the bottom groove and the top of the radius.
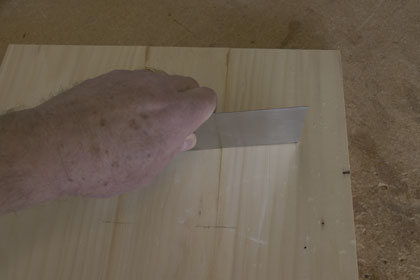
 Sand everything smooth and do a fit check before gluing. If you are happy with the way things go together apply the glue and clamp.
 Apply glue to the biscuit and put it into the slot then spread the glue along the edges. Apply glue to the protruding half of the biscuit and to the matting edge of the wood. Place scrap wood under the clamps and clamp everything in place to dry.
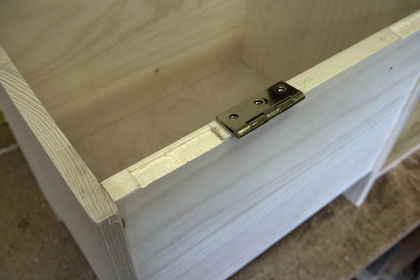
 I cut the top 3/4" wider and 1" deeper than the box. In order for the hinges to work correctly they need to be offset a little bit. The following photos show how I did the hinges.
 Layout the locations for the hinges. A handy little tool I have is the Incra Precision T-Rules. You just put your pencil tip into the correct hole and drag it along the edge. They are very accurate and really speeds things up.
Sand everything smooth and apply what ever stain you like. I really like the General Finishes EF line of stain and finishes. The EF stands for environmentally friendly and the water clean up really makes it nice.
 EF Wood Stains

That's about it. We hope you liked this project. If you build it and your friends ask where you got such a clever idea, please tell them that you got it at RunnerDuck.com.
|


|
The AllAmerican RunnerDuck Review Visit our Blog, www.runnerduckreview.wordpress.com, and sign up to receive notifications when it is updated. Our newsletter is a monthly blog with woodworking projects, crafts, recipes, and more. When you get to our blog just enter your email address and click "Sign Me Up". This is what it looks like:

|