

|
By now all the parts should be cut out and you should be ready to start putting your planter together. The first thing I would do is put a finish on all the wood pieces. Pay special attention to the edges that will match up with other edges. You might want to even consider an outdoor wood protector especially for the wheel and legs. This will make your project last a lot longer since it will be outdoors almost year round.
Assemble the base to the handles.  Allow just enough space for the wheel to fit between the handles. Place the first board 7 3/4" from the front of the handles. Space the handles 3" in from the edge of the back bottom piece. Screw them down with two 2" deck screws per board per side. Mount the sides to the base by screwing up from the bottom. Position the back pieces and screw them in place from the sides. Repeat this for the front. Use a 1/4" bolt, two flat washers and a locking nut to mount the wheel. 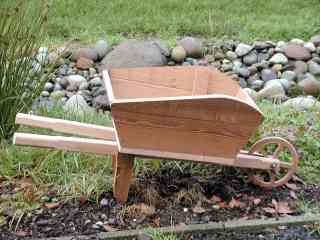 Now fill it up with some good dirt and pretty flowers. A special thanks to Marilyn’s dad Frank for this projects inspiration.
|
|
The AllAmerican RunnerDuck Review Visit our Blog, www.runnerduckreview.wordpress.com, and sign up to receive notifications when it is updated. Our newsletter is a monthly blog with woodworking projects, crafts, recipes, and more. When you get to our blog just enter your email address and click "Sign Me Up". This is what it looks like:

|